Friday, October 31, 2014

Easy Fall Table Centerpiece

With today being Halloween, that means the spooky decorations will be put away tomorrow and the rest of my Fall decorations will take their place.  I was looking for something not too big but not too small to go on my kitchen island and then remembered something I saw on Pinterest a few months ago for a summer centerpiece.  So with that inspiration, I finally found the vase I just knew I had somewhere around the house, gathered up my burlap ribbon, Glue Dots, Core'dinations cardstock, and my "Harvest Friends" cutting file from Little Scraps of Heaven and started crafting. 

(click to view larger image)

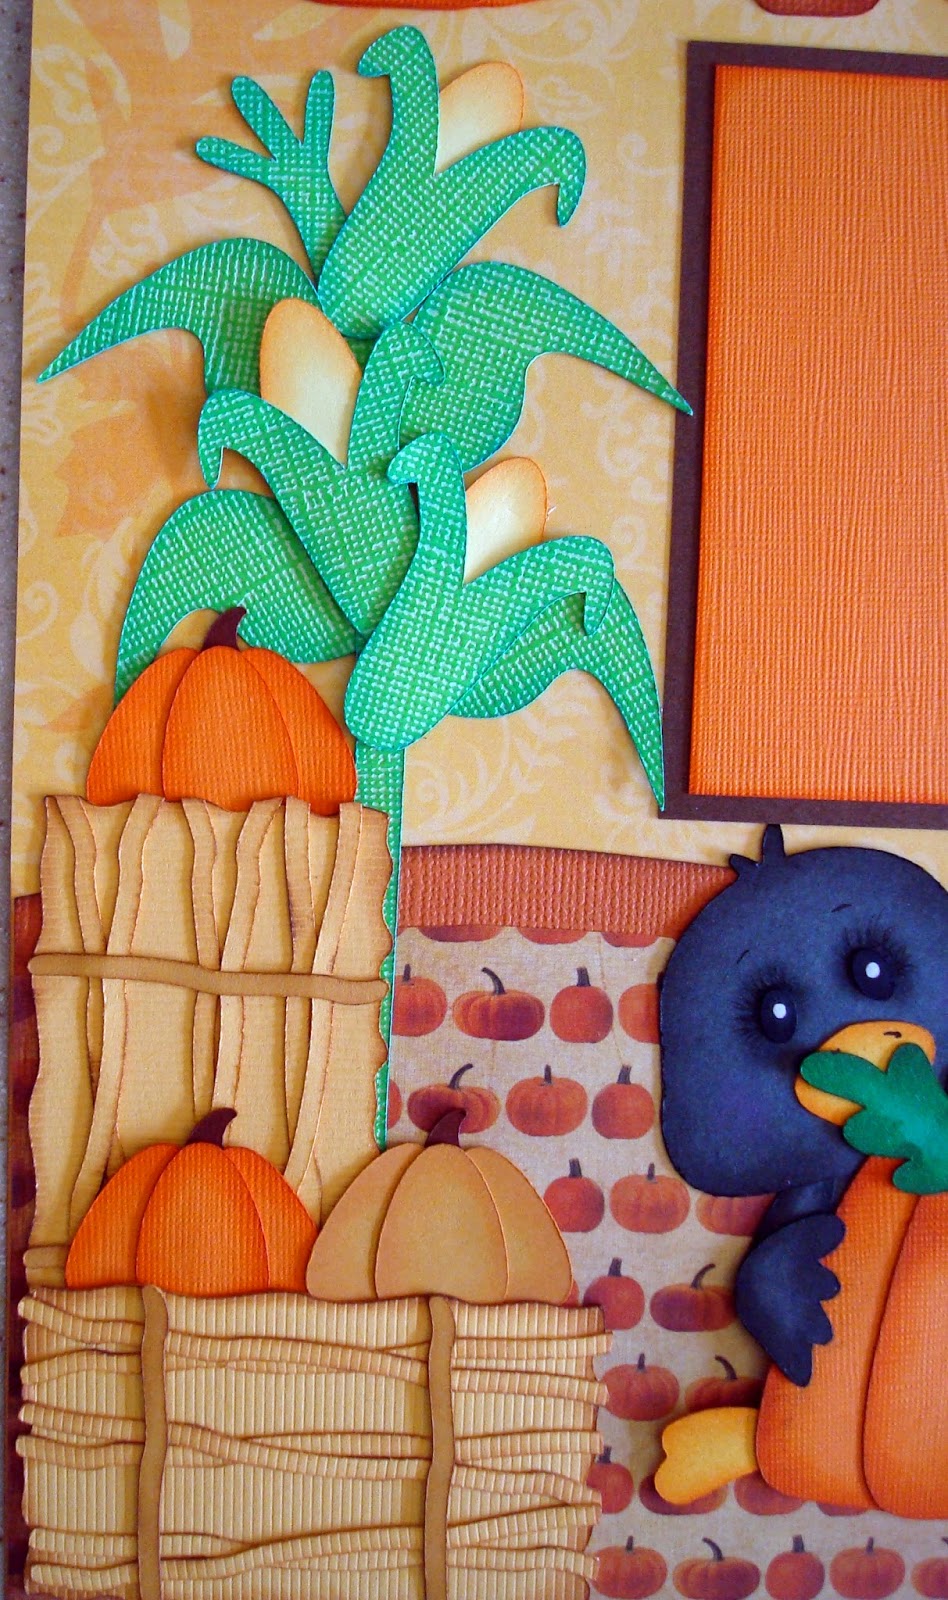
I think this centerpiece turned out just perfect.  For whatever reason, my photo makes the vase look small, like a votive, but it is actually about 6 inches in diameter and about 5 inches tall.  The leaves turned out so pretty and cool looking and I love the rustic look they have with the burlap ribbon.  I also really like how the candy corn blends right in with the colors of my Fall owls.  

Okay...confession time!  The vase looks like it is totally full of candy corn, but actually there is another smaller glass inside the vase and the candy corn is in between the two glasses.  I have a couple LED candles inside the smaller interior glass so that, when turned on, the candy corn and leaves will have a little glow in the evening time.

I hope this simple and easy project has given you a little inspiration!

Until next time...Happy Scrapping!


Wednesday, October 29, 2014

Making Caramel Apples Layout

Happy Wednesday everyone!  Today I'm sharing a cute two-page layout that I titled "Making Caramel Apples".  I used a few cutting files from Little Scraps of Heaven Designs on this layout:  Apple Picking Mice (apple tree), Apple Bushel, Caramel Apple Ghost, and Cooking Up Some Fun (pot, bowl, spoon).  

(click to view larger images)


For the words "Caramel Apples" in the title, I used a font called Grand Hotel.

I hope you enjoyed today's project!  Thanks for looking and until next time...Happy Scrapping!

Sunday, October 26, 2014

Halloween Hop Winners!!!

THANK YOU so much to everyone who "hopped" with us yesterday during the Little Scraps of Heaven Designs HALLOWEEN HOP!  I'm especially thankful to those who hopped over to my Facebook fan page AND here on my blog and became new followers.  I really appreciate all the wonderful comments I received about my project.

Since the response was so fantastic I've decided to draw two winners instead of one...one from Facebook and one from my Blog.

The winner from my Facebook post is MELISSA McMILLAN

The winner from here on my Blog is EVA LANEY (Eva Scraps)

WOO HOO!!!!  CONGRATULATIONS LADIES!!!

Contact me at myscrapbookgarden@gmail.com with your mailing information so I can send your prize to you. Please put HALLOWEEN HOP WINNER as the subject.

THANK YOU AGAIN to all my new followers!

Until next time...Happy Scrapping!

Friday, October 24, 2014

LSHD HALLOWEEN HOP

Welcome to the Little Scrap of Heaven's Design Team HALLOWEEN HOP! 


If you are visiting from Colleen's page you are in the right place.... but if you just happened upon my page and would like to start at the beginning of the Hop, please head over to the LSHD Blog: Little Scraps of Heaven Designs or FB Fan Page: Little Scraps of Heaven Designs

For some spooky inspiration for this Hop, I created a Halloween Mini Album using chipboard lacing cards that features paper piecings from the "Spooky Hollow" and "Witch Frog" files.  The back of each lacing card is also finished off with colorful Halloween papers. This stand-up album looks so cute and fits right in with my Halloween decorations!  All I need now are some BOOtiful pictures of the grandkids in their Halloween costumes to make it complete.


Here are the front and back sides of my mini album:


For this project I inked the chipboard lacing cards with some Ranger Black Soot Distress Ink and then covered them with paper from the DCWV Eek-A-Boo Paper Stack.  The LSHD paper piecings were made from heavy cardstock and inked with chalks.  The paper piecings were so easy to put together even though I sized them smaller than I normally would for a scrapbook layout.  Aren't they just adorable???   To complete the album I used black tulle to tie all the chipboard pieces together.

Chipboard Lacing Cards and the Ranger Distress Ink

Close-up of the first panel

Cute little "Witch Frog" and pumpkins from "Spooky Hollow" 

Close-up of the Cat and pumpkins from the "Spooky Hollow" collection

And finally a closer look at the Ghost

Be sure to leave a comment on this posting AND all the other Design Team members' blogs or Facebook Fan Pages for your chance to win a little Hop Candy from me!  One lucky person will win this 6 x 6 Eek-A-Boo Halloween Stack by DCWV so they can create some of their own amazing Halloween projects.


Don't forget about our other fabulous Halloween Hop prizes!  One winner will be picked by each Design Team member from all the comments left on their FB and Blog pages. Be sure to COMMENT on ALL the Design Team blogs or fan pages to be eligible for a prize!

But that's not all!  The Grand Prize for this Halloween Hop will be $100 in patterns (regular price) from Little Scraps of Heaven Designs.  That is one AMAZING HALLOWEEN TREAT for one lucky winner!  In order to be eligible to win the $100 in patterns, you must leave a comment on the LSHD Blog or the LSHD Facebook Fan Page as well as ALL the Design Team members' blogs or fan pages who are participating in this Halloween Hop.

Thanks so much for stopping by!  I hope you enjoyed my Halloween project and also visiting my blog.  I'd love to have you follow My Scrapbook Garden!

Your next Hop visit will be Doris ' page.

If you get lost along the way, here is a list of the entire BLOG lineup.  We hope these ideas have inspired you!

Blog Line Up:

Or you can also Hop with us by visiting the FACEBOOK FAN PAGE LINE-UP:
Lisa 

Until next time...Happy Scrapping!

Thursday, October 23, 2014

Too Cute To Spook

Happy Thursday!  Today I'm sharing a little layout I just finished for a baby album book that needs to be completed TODAY (baby was born yesterday...yikes!).  Since she arrived just in time for Halloween, I thought "perfect timing" for a "Too Cute To Spook" layout.  

(click to view larger images)

The little mouse paper piecing is from the Little Scraps of Heaven Designs "Jeepers Squeakers" collection.  There are several cutting files in this collection (and they are all adorable!), but since my paper was a little on the busy side, I felt this one piece was just enough and worked perfectly.  Here is a close-up of the paper piecing:


The title was made using some black glitter Thickers and my Sizzix Sizzlits "Cat 'n' Mouse" alphabet set.


Here is a link to the "Jeepers Squeakers" file on the Little Scraps of Heaven Designs website:


I hope you enjoyed seeing this fun little layout.  Until next time...Happy Scrapping!


Tuesday, October 21, 2014

Shades of Fall Layout

Well, fall is finally beginning to show its beautiful shades of color around my neighborhood and that's what my inspiration was for this layout.  The paper piecing patterns I used are from Little Scraps of Heaven Designs and they are "Squirrel With Acorns" and the leaves are from the "Harvest Friends" collection.

(click to view larger images)

I've had some of the Tim Holtz Kraft-Core Shattered cardstock by Core'dinations in all these fall colors for a little while now and wondered how it would look to make leaves out of them. Umm...fantastic!!!  They turned out so cool looking especially after I shaded the edges with the Vintage Photo Ranger Distress Ink.


The Squirrel With Acorns is an absolute adorable file and went together so easily.  For the tops of the acorns I scored them on my Scor-Pal and then inked over the score marks with the same Distress Ink for some added dimension.  The whole piece looks so natural on top of a couple more leaves, don't you think?


Here are the links to the two LSHD patterns I used in this layout:


I designed the title for this layout in SCAL2 and used a font called HomewardBound.

Thanks for looking at my Shades of Fall project.  Until next time...Happy Scrapping!


Saturday, October 18, 2014

Sunflower Layout

Happy Saturday!  And speaking of happy...this layout totally makes me smile!  I just LOVE sunflowers and when I took my grandson to one of the local pumpkin patches a few days ago, there was a huge section of sunflowers growing there.  Guess what that meant???  Picture time!!!  I have to admit that while we were taking these pictures I already knew exactly which scrapbook papers I wanted to use!  Been saving those babies for a long time and finally have just the perfect photos and paper piecings to go on them.  Let's also give a hand to the great little 7-year-old photographer who got grandma AND the sunflowers in the shot!!! (clap, clap, clap)

The paper piecing is the "Scarecrow and Pumpkin Photo Cluster" file from Little Scraps of Heaven Designs. Although it's designed to use with a photo, for this layout it worked perfectly to hold my page title.

(click to view larger images)


This scarecrow turned out just adorable.  I remembered that I had some little button brads in my stash just dying to be used, so I busted those out and used them on his overalls instead of the paper piecing ones that are part of the file.  Oh, and since he had a free hand, I figured he could hold a little journaling tag I made by using my 1-1/4" circle and 1-1/2" scallop circle punches (LOL!).


There are a lot of little pieces for this corner embellishment but it was actually kinda fun putting it together.


I printed my title from my computer.  The fonts I used are CK Curly and CK Shadowed Block. The sunflower paper is from the Graphic 45 French Country collection and the circle in the middle of the green scallop is made from a paper that I've had ever since I started scrapbooking (yikes!).  It's a Tim Coffey embossed paper designed for K&Company.

Here is a quick link to the "Scarecrow and Pumpkin Photo Cluster" file on the LSHD website:


Hope you enjoyed this project!  Until next time...Happy Scrapping!

Thursday, October 16, 2014

Little Fashionista Layout

Here is a one-page layout that will be added to the baby shower gift album that is sooo close to being completed. Baby's due in less than 2 weeks!  Mama-to-be got so many cute outfits at her shower that there's no doubt this new baby girl is going to be a true Little Fashionista!

(click to view larger images)

Mama-to-be is going to love this layout.  Although she likes the soft, shabby-chic look, she's also very much into the animal prints and bright colors so I think this page will fit perfectly in her album.


For the little outfits I used files from the Little Scraps of Heaven "Magical Pals" and "Raggedy Witch" collections.  I just love how these files are so versatile.  I mean, seriously, who knew a Raggedy Witch dress could turn out looking even more darling in another color, right???  And the plain white top with jeans shorts from the "Magical Pal" file is actually the little boy "Don" clothes.  Just added the hot pink heart sticker and instantly it was a little girl's outfit. The pink "Minn" dress and plaid "Daisy Mae" romper were so easy to put together that I could have made a whole closet full of these clothes -- Too stinkin' cute!


I used the little hair bows as little accents on the photo mats.


For the title, I printed "Little" from my computer and designed "Fashionista" in SCAL2 using a font called "CK Curly".

Hope you enjoyed this project.  Until next time...Happy Scrapping!

Monday, October 13, 2014

Cutest Little Giants Fan Layout

Okay...I don't follow Major League Baseball, but I think I really knocked this layout out of the park! One of my very good friends is a die-hard SF Giants fan and she is expecting her first grandbaby (a girl!) in a couple weeks.  After seeing all the adorable Giants onesies, headbands and clothes she bought months ago for the new baby, this layout was an absolute MUST!  It's going in the infamous baby shower gift album that I'm working my you-know-what off to finish to give to the mama-to-be, hopefully before she delivers! Only two more layouts to go...

For a one-page layout, there's really a lot behind this.  For starters, I called around looking for SF Giants scrapbook paper.  Fortunately the Beverly's in Modesto had this so I didn't have to drive too far for it.  Of course driving around 20 miles for a $1.29 sheet of paper ended up costing me $24.67 but that's a whole other story.  I was disappointed that there were no stickers or other embellishments to go with the paper but I knew I'd figure something out.

After getting home with my prized Giants scrapbook paper I started searching the Internet for some free "official" SF Giants logos, clipart, etc.  I printed off the present Giants logo on photo paper and downloaded the official "SF", wondering if I could possible get it into SCAL2 and cut my own embellishment. Well, as you can see, I was able to Trace it in SCAL2 but I couldn't figure out if there was a way to separate the shadow part.  I thought "no biggie, will make my own".  It took a couple tries but I got my shadow to fit perfectly and it was a HOME RUN!!!  Love how it turned out.

So back to the layout...

Here it is in all its glory:

(click to view larger images)


I had actually purchased some orange with large white polka dot paper to make the picture frame. It was cute, but just way too much orange for the layout.  It was making me twitch, so I calmed it down with a soft gray instead.  Much better...twitching went away.

The black loopy border is from a Martha Stewart punch, the title "Cutest Little" is a font I have on my computer called Team Spirit and the "Fan" is another font called Freshman.  The paper piecings are from Little Scraps of Heaven Designs and are from the Little League collection. I think they added just the perfect whimsical touch to this layout. Here is a quick link to that file if you'd like to check it out:


I hope you enjoyed this post and like the layout!  Gotta go think about the next layout for the baby album... so until next time, Happy Scrapping!

Saturday, October 11, 2014

Fun at the Pumpkin Patch Layout

Today I'm sharing a layout I just finished titled "Fun at the Pumpkin Patch".  I think this turned out pretty adorable (if I say so myself) and has a LOT of little pumpkins in them.  They were so easy to make that I just sort of went crazy LOL!

The paper piecing files are from Little Scraps of Heaven.  I used the Harvest Crows and Pumpkin Patch Fun collections.  Harvest Crows is a new file from LSHD and the Pumpkin Patch Fun collection is actually in the "Retiring Soon" section on their website.  I fell in love with the cornstalks and hay bales so I grabbed this file up before it's gone forever!

Here's the whole two-page layout:

(click to view larger images)

As you can see, there are a LOT of little pieces all put together for this layout. For me this meant a LOT of chalking, but I really like that look so it didn't matter to me that it took like 3 days to put this whole layout together.  Lots of little details...

Here's a closer look at the first page:


Not sure why the little crows are looking blue in this picture -- they are really a charcoal gray with black shading. Hmmm...strange.  Maybe too much editing in Picasa???

The title turned out fun looking.  The Pumpkin Patch words were created in SCAL using a font I have on my computer, but the "Fun at the" was actually made using my Sizzix Big Kick (before it was released as the Big Shot) and some Sizzlets.  Yep, I actually busted those babies out and used them!  The Sizzlets font is called Cat & Mouse and it is ADORABLE!  I remember just having to have this set about 5-6 years ago and, hate to admit it, but this is the first time I used it!  May just keep this set out and handy...


These little Harvest Crows are just darling and are very easy to piece together. All the pumpkins are from this same collection.


The cornstalks and hay bales have a lot of pieces to put them together but the end result is so worth it!


And now a closer look at the second page:


Again, not sure why my little crows are looking so blue...

Anyway, hope you enjoyed checking out this layout.  Have a great weekend and, until next time, Happy Scrapping!

Wednesday, October 8, 2014

Robot Party Layout

Hello!  Last week, due to popular demand, Little Scraps of Heaven Designs re-released their Little Robots file that had previously been retired.  I was all over that file because I had just the perfect photos to scrapbook and tons of super cool robot papers.  Yep, my grandson's 6th birthday party last year was...wait for it... a ROBOT PARTY!  Woo Hoo!!!  So here's the beginning of what will probably end up being a few layouts to scrapbook the whole party.

(click to view larger images)

The Little Robots paper piecing pattern from LSHD was extremely easy to put together and has so many options of robots and gears.  Here's a closer look at just the first page:


To make the border of gears at the top of the page, I sized several of the gears in the Little Robots pattern on my virtual mat in SCAL2 and then made a copy of them and ungrouped them.  I then moved the gear copies around, overlapping all the different sizes and shapes, until I was happy with the look.  Next I selected the overlapped shapes and clicked on "Union" to make them all one piece.  After that I selected the piece and clicked on "Shadow Straight" at .50". Once all these pieces were cut out, I then placed the original individual gears onto the shadow.  I really like how it came out, especially using all the bright colors that were used at the birthday party.  Here's a closer look at the gear border:


I designed the "Robot Party" title from a font called Arcade Rounded that I have on my computer and replaced the "o's" in Robot with some smaller sized gears.  To make the title look more robot-like, I added a couple of silver Candi paper brads in the middle of the gears.  Too cute!

The frame for the picture was also designed in SCAL2 by welding two rectangles and one of the gears together.  I added a couple more colorful gears and a robot sticker I had on hand.  Worked perfectly if I say so myself LOL!


This little robot tag turned out adorable.  I placed the little knob/buttons over to the right side of its body and felt that was the perfect place to "journal" that it was Ace's 6th Birthday.  Love it!


And now for the second page:


Again, I sized several of the gears to embellish the bottom of the photo.  Didn't shadow this one...got a little lazy LOL! 


And, finally, here is my second robot.  Instead of him being a full-sized robot, I made him into a photo "peeker".  But that's not all...Surprise!  He's actually a hidden journaling tag tucked in between the two photo mats.


I hope you enjoyed seeing all the details of this Robot Party layout.  If you're interested in the Little Robots pattern, here is a quick link to the LSHD website where you can find it:


Until next time...Happy Scrapping!