Showing posts with label Card. Show all posts

Wednesday, February 17, 2016

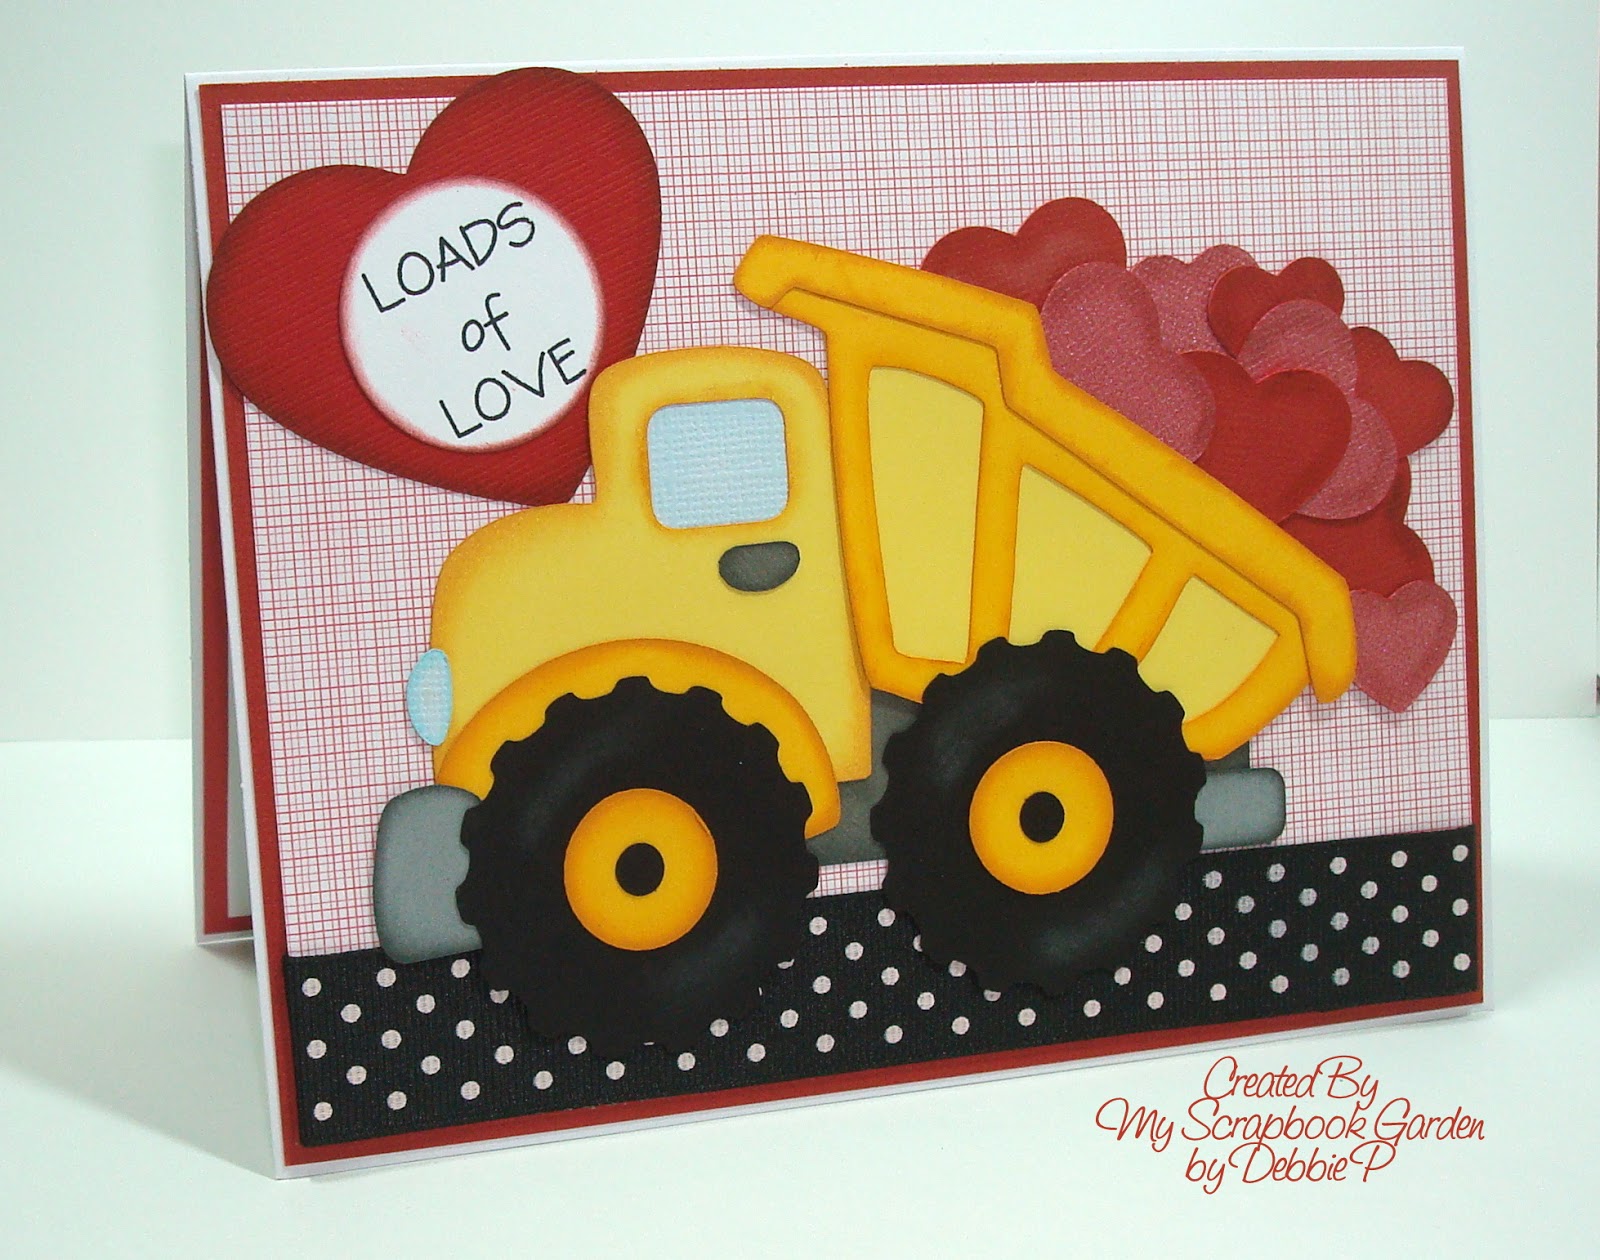
Loads of Love Valentine's Day Card

Today I'm sharing a Valentine's Day card I made using the dump truck pattern from the "Under Construction" file set by Cuddly Cute Designs.  I also used one of the hearts from the "Heart Flourish Set" and cut it out in three different sizes in two different shades of red cardstock.

(click to view larger images)

My card measures 6.5 x 5 and I just love how it turned out.  I didn't have any black with small white polka dot paper, so I used some wide ribbon that I found in my stash.  Worked perfectly!  I printed the "Loads of Love" from my computer onto white cardstock and then just used a circle punch to cut it out.

Here's a peek at the inside -- just a simple sentiment that I also printed off my computer.


The "Under Construction" set has a lot of fun pieces included in it.  One of my grandsons had an Under Construction birthday party a few years ago that I STILL need to scrapbook, so this file will certainly come in handy for that! Here's what that cutting file looks like:


If you'd like to see this file and more, you can find them on the Cuddly Cute Designs website HERE. 

Thank you for stopping by today!  Until next time ... Happy Scrapping!
Wednesday, February 3, 2016

Lion Valentine's Day Card

Hi everyone!  Today I'm sharing a fun Valentine's Day card I made using the Lion pattern from the Cuddly Cute Designs "Zoo Animals" collection and also a couple hearts from the "Heart Flourish Set".


Card Front
(click to view larger images)

Inside Card

I was looking through my Valentine papers and came across this adorable lion paper (it's from an older K&Company paper stack) and right away thought it would go perfectly with the lion pattern -- and it did! So that's how this card idea popped into my head!

I also used some alphabet stickers for the word "Valentine" on the front of the card and printed the inside card sentiment on my computer.  Also, to give the card a little dimension, I added some foam tape to the lion to make him pop a little off the card.

This lion is so stinkin' cute and I just love his face! Hopefully my card recipient's heart will 'roar' with excitement when they open it up!

Thank you for stopping by and I hope you enjoyed seeing this card.

Until next time ... Happy Scrapping!


Sunday, January 31, 2016

How To Make the CCD Heart Spinner Card

Hi everyone!  By now I'm hoping that you've seen all the new SPINNER CARDS by Cuddly Cute Designs.  If you haven't, you are missing out on some amazing new patterns!  There are TWELVE different styles of these cards so far, and I'm sure there's something there for everyone!

Here are three of the SPINNER CARDS that I have made so far:

Heart Spinner Card
(click to view larger images)

Frog Spinner Card

Cupid Bear Spinner Card

The ‘spinners’ can be paper pieced OR made with Print & Cut by using the included PNGs with each Spinner Card pattern.  My Heart and Frog pieces were paper pieced and my Cupid Bear was made by using the Print & Cut function on my cutting machine.

Although these are pretty simple to cut out and assemble, I thought I'd share how I put together the Hearts Spinner Card.

The most important piece of advice I can share with you is to MAKE YOUR SPINNER PIECE FIRST!  I got so caught up and excited when I was making my first Spinner Card at how cute it was turning out that I completely forgot to glue my elastic cording to the spinner base and ended up having to take it apart -- aauugghhh!!!  Not fun!  So take my pearls of wisdom and make your spinner piece first and save yourself some frustration LOL!

So here goes:

My pieces are shown here all inked up.  I like to keep my loose pieces on my cutting mat so I don't lose any of them while assembling.


Parts are assembled and now I'm ready to put the entire card together.


I started by placing a glue strip down the center of my base front.  Next I placed the elastic cording on top of the glue strip to hold it in place. **IMPORTANT: Leave enough extra cording at the top and bottom to adhere later to your card.**  I used the elastic cording that you make jewelry with but you can also use thread, fishing line, etc.  I just happened to have some of the cording in my stash. 


Next I glued the four hearts on top of the spinner base and over the elastic cording.  Notice that there is plenty of cording on each end to adhere to my card in the next step.


I then placed the Spinner piece in the middle of the card base opening and glued it in place.  Although it doesn't show in my photo, in addition to my dot runner I also added a Glue Dot.  Probably overkill, but I wanted to make sure it stayed in place. 


The card front was then placed onto the card base and glued together.  Since I wanted just a tiny bit of my black card base to show and look like a border on the card front, I trimmed 1/16" off each of the four sides of my patterned paper.  Just a personal preference for this particular card.


After the card front was glued to the base, I simply snipped off the exposed elastic cording from the top and bottom.


This is a look at the back of the Spinner piece.


Now it was time to add the rest of the paper embellishments.


Lastly, I glued a piece of matching ivory cardstock to the inside of my card for my sentiment and Voila! my beautiful new Heart Spinner Card was complete! 


I hope you love these new SPINNER CARDS as much as I do and that this Step-By-Step was helpful.  You can also see my three Spinner Cards "in action" by viewing this Spinner Cards Video

Thanks for stopping by!  Until next time ... Happy Scrapping!


Monday, July 20, 2015

Heard the SCOOP Card

Hi everyone! I'm sharing a quick card I made today using the ice cream cone from the "Cool Treats" collection by Cuddly Cute Designs.


For the scoops of ice cream I used some BoBunny Double Dot paper, and for the cone I used some tan colored cardstock scraps I had and then ran it through one of my embossing folders. Next I used a Dark Brown Cats Eye chalk over the embossed areas. For a little sparkle, I added some Icicle Stickles to the ice cream pieces.

Don't you just LOVE IT when you need a fun little item to add to a card and you have so many things to choose from all the wonderful collection sets from Cuddly Cute Designs? I know I sure do! This ice cream cone certainly did the trick for me!  Here's a peek at what the whole "Cool Treats" file looks like:


Thanks for stopping by! 

Until next time... Happy Scrapping!


Thursday, July 9, 2015

Red, White & Blue Challenge

Happy Thursday everyone! Hey.... have you seen the latest Challenge going on over at Cuddly Cute Designs? It's a really fun and easy one... just make anything using Red, White, and Blue colors and any CCD file!

You have until July 19th to submit your RW&B project and be entered for your chance to win a CCD pattern of your choice! Winner will be randomly selected! See -- I told you it was easy! Hopefully my example card with give you a little RW&B inspiration!

I made this card using the Calendar Markers file and the marker pattern for the month of July.

(click to view larger images)

I used white cardstock for my card base and matted this adorable Doodlebug patriotic paper (an oldie but a goodie!) with red cardstock.  My picture isn't the greatest, but I used Diamond Stickles on all the stars to give them a little Star Spangled Sparkle!

This RW&B Challenge has SO MANY project possibilities; could be anything from Patriotic, to Summer, to Christmas - let your imagination be your guide!

Here's what the whole Calendar Marker file consists of:


This little gem of a file has so many fun elements to it! They would be a great addition to any project or would be perfect just by themselves.  If you're interested, you can purchase this Calendar Marker file by clicking HERE

I hope to see YOUR Red, White & Blue Challenge project soon on the Cuddly Cute Designs FB Fan Page!

Until next time... Happy Scrapping!


Thursday, June 11, 2015

"Super Dad" Father's Day Card

Here's a "super" fun Father's Day card I made using the new "Super Dad" pattern by Cuddly Cute Designs. I really love how this piece turned out! I popped this little guy up by using an Action Wobble so now, when you flick him, he looks like he's flying through the air and leaping tall buildings!

(click to view larger images)

Isn't the background paper I used really cool?  This is actually part of a paneled paper that I've had ever since my 7-year old grandson was like one or two, and I purchased it just because I KNEW I'd probably need it someday LOL!  This paper has about 5-6 paneled city scenes that work perfectly for this type of project.

Here's a quick look at my super simple sentiment.  I love this comic book looking font.  It's called SF Comic Strip.


Don't forget the 50% Off Sale on the CCD website where you can grab your own "super" files: www.cuddlycutedesigns.com 

Until next time... Happy Scrapping!

Thursday, April 30, 2015

Creative Fold Card Challenge

Have you heard about the NEW CHALLENGE going on now over on the Cuddly Cute Designs Facebook Fan Page? This time around it's a card challenge. To be more specific, a card with a CREATIVE FOLD, anything other than a classic folded in half down the center card, and of course, make sure there is a CCD pattern used on the card somewhere. This challenge will run through May 10th! We had some really great entries during the last challenge and we would LOVE to see just as many if not more participants have fun with this challenge.

Here's my creative fold sample which is an easel card using pieces from the CCD "Cuddly Critter Bees" which you can see HERE.

(click to view larger image)

We can't wait to see everyone's creative fold card entries! Winner will get a Cuddly Cute Designs pattern of their choice -- there's still plenty of time to submit your entry!  Check us out on Facebook HERE.  

Until next time...Happy Scrapping! 


Birthday Card

Last weekend was my niece's 23rd birthday and I'd like the share the card I made for her.  Since I'm on the Design Team for Cuddly Cute Designs, I wanted to make my card for her using one of their designs.  As I was going through all my CCD patterns trying to decide which one to use, I came across the "Bear With Roses" file and remembered that my niece's middle name is Rose.  That was it -- I knew I had to use that one.

I wanted to keep the card pretty simple, so I decided to use just the bundle of roses that is part of this pattern.  Here's my card:

(click to view larger image)

The roses in this pattern are very easy to assemble and I just LOVE the dimensional look they have.  Each rose has 5 pieces, not counting the stems & leaves, but please don't let that scare you LOL!  Like I said, very easy to assemble!

After completing my bundle of roses, I glued them onto a scalloped oval I had made a long time ago and didn't use.  They fit perfectly onto this oval and the end result was a very pretty but simple card front.

I printed off my simple birthday sentiment for the inside of the card, glued a 2" strip of the red paper on the opposite side of the cover (which I forgot to photograph!) and slipped a little "something" into it for the birthday girl.  Quick and easy card, but one with a lot of heartfelt thought put into it.

If you'd like to see the entire Cuddly Cute Designs "Bear With Roses" pattern, you can find it HERE 

Thank you for stopping by!  Until next time... Happy Scrapping!